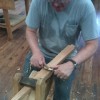
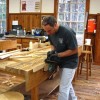
Category Archives: New Classes

Marking Versus Cutting Gauge


This past week we had a fine keepsake box class and cut many dovetails. We used the cutting gauge for marking the depth of the pins and tails so I would like to take this opportunity to iron out any confusion there may be in regards to a cutting gauge versus a marking gauge. Obviously, a marking gauge is for marking and a cutting gauge is for cutting!

More in depth, a good cutting gauge has a knife blade in it, and a marking gauge simply has a pin. The question is: why wouldn’t you just use a marking gauge for marking out your dovetails? The answer lies in which grain direction we are marking. When laying out dovetails you always mark across the grain. If I use a standard marking gauge with a pin as shown in the picture; working across the grain; we will be scratching the surface and tearing the fibers, leaving an unsightly line.


On the other hand if I use a cutting gauge, which has a single bevel knife blade as opposed to a pin; it cuts and severs the cross grain fibers, leaving a beautifully clean and crisp line across the fibers, as shown in the picture.


So what purpose does the marking gauge have? As a general rule the marking gauge, (which has a pin) is used exclusively with the grain. Most marking gauges are also set up as mortise gauges and will have double pins. Mortises are marked with the grain therefore a pin is not at all a problem. The cutting gauge is most often used across the grain but still can be used with the grain. In the past I have sharpened my marking gauge pin to a knife-edge; the problem with this is that you have to make a double bevel which forces the fibers on either side of the bevel.

My cutting gauge has a bevel on one side only, thus leaving a crisp hard edge with the bevel facing the waste side.  A bevel will always bruise the wood; therefore you always want to have the bevel facing the waste side.


I also use the cutting gauge when I am working on cross banding and inlay. It really is my secret weapon for hand tool woodworking. I used it extensively when I made the rose table for cutting across the grain prior to inlay and cutting cross banding to size.

Now the question, where do you find a good gauge?  There are a few cutting gauges out on the market, but most are not well made, unless of course, you want to spend a lot of money. Check these out here!

The main problem that I have found with less expensive gauges is that the blades are not configured correctly, that is, they are not sharpened to the right shape. The other problem that I have found is that the wedge that holds the blade in place does not offer a good positive hold.

Faced with the quandary of needing several gauges for a recent dovetail class, I decided to just make some. Here is the finished gauge, and it works fabulously! I hope to write an article on how to make your own, so stay tuned. In the mean time, we are working on a tool making class which will include making your own cutting gauge. We will keep you posted on the details.

At the Kansas City Woodworking Show 2013!

This weekend, January 25th – 27th  2013,  we are in Kansas City Missouri, to demonstrate at one of the Big Ten Woodworking Shows. Many of you have seen our set up at the Texas shows but we are pleased to be able to do the same in Kansas City. If you are anywhere near the area please stop in. We will be demonstrating hand tool joinery and the use of hand planes as well as inlay and even guitar making. You can check out a complete listing of what we will be demonstrating as well as the times right here. You will also be able to see many of the new class projects that we have developed in the past year. I have also brought along my Roses Table that I just recently finished. You can read more about it here, and if you come to the show you can see it first hand!

As a bonus you will have the opportunity to buy some new tools from Lee-Valley and others. Check out the show and directions here on The Woodworking Shows website. As a side note, if you came out last year they have changed the location so make sure you check out the website for directions.

The show starts this Friday the 25th and runs through Sunday the 27th,  2013.

Hope to see you there!

Frank Strazza

A Great Dining Chair Class Completed!

Well we just finished up another great advanced furniture class. Although it was hot outside we kept the A/C cranking and everyone had a great time. Especially at 3:00 when we took our afternoon ice cream break at the Café. For those that have never been to our shop, our Homestead Café is a stone’s throw from the shop, offering many savory meals including some of the best homemade pies and the best ice cream available!

There was much to learn in this 6-day class as everyone chopped all their mortises by hand, and then cut all the tenons by hand.

Here is Steve trying out my Danish bow saw on his tenons, this saw is super fast, and a blast to use.

The legs were marked out carefully, and in some cases re-marked, prior to cutting out the shape on the bandsaw.  Then the fun began as we carefully shaped the profile with spokeshaves and scrapers.  The question was asked how would you cut this out if you did not own a bandsaw? Well I tried it on one of my legs. I started by making a few stop cuts with a handsaw and then grabbed my trusty hatchet! This made quick work of removing a lot of material. Then I went to the drawknife to get right down to the line, finishing up with the spokeshave. I think the leg turned out great, but I will say I am not ready to give up my bandsaw just yet!

The shaving horses worked out very nice, especially for holding the shaped legs while working on them. If you have never used a shaving horse, you will have to come try one out, they are simply the best clamp invention for odd shaped pieces, from spoons to chair legs and arms to rockers.

We covered cutting angled tenons as well, which always take a little concentration, making sure not to cut an angle going the wrong way!

On to fitting arms and then sculpting the seat, finally cutting an inch off the back of the chair makes it sit just fine.

A couple of the guys used hide glue to glue up their chairs. Why? Well, because it is traditional! Actually there are many reasons to use hide glue. For one, it is reversible, making it easier for someone to repair the chair in the future. Another reason is that it is much easier to clean up, if some spills out of the joint. It also does not interfere with the finish. I often tell people that the finest furniture that was made, furniture that was made hundreds of years ago is still holding together with hide glue, so I think if it was good enough for Sheraton and Phyfe, it should work just fine for us!

Here is a picture of the finished chairs. Originally this class was a one time offering course, but we may offer it again next year. Stay tuned, we are working on the 2013 class calendar now.

Dresser Course Completed!

Wow, we’re done! No it didn’t take 5 weeks, it’s just that I have finally recovered enough to write about it! It really was a great 2 weeks with 5 enthusiastic students. Each one completed a dresser with over 75 hand cut dovetails! The drawers were done with half blind dovetails in the front with through dovetails in the back and then solid drawer bottoms that were hand planed to a beveled edge to fit in a groove in the drawer side.


We used soft maple for all the internal drawer parts. Larry did a super job on his dovetails. He decided to make his dresser out of walnut, which contrasted very nicely with the maple. Larry chose to do needle point dovetails, which are quite challenging. This was his first attempt at that style dovetail but the results were top notch.

Carl had to leave early on Saturday, so here he is with his finished cherry dresser.


Here is the rest of the group with their finished dressers late on Saturday afternoon.

I have mixed emotions at the end of a 2-week class. It’s sad to see all my friends leave after having spent so much time together. It is rewarding to see them leave with such an accomplishment after much hard work.


Some of you know that most of the wood is pre-milled before and sometimes during the class. This is just in the interest of time; if we had to mill all the wood during class, we would have people standing around waiting and it would add a lot more time to the class. Plus we want to focus more on the hand skills such as the joinery and surface preparation during class. Having said that, the wood milling for this class is a HUGE job. So on behalf of the class I want to say a BIG THANK YOU to Jonathan for doing such a great job, for tirelessly milling all the wood for the class so perfectly.

Ironing out the wrinkles!

This past week we have been working quite hard on 5 handmade dressers. This week will be a dovetail extravaganza; as we have all the cases completed, our attention will be turned to the drawers.

As the students worked on the cases side, planing, scraping and sanding, I hear the occasional, “Oh no, there is a big dent on my side!”  I make a quick run to the tool cabinet to pull out the trusty clothes iron (bought second hand) I say “We’ll just iron it out!”

The best way to remove a dent in your furniture is to get a wet cloth and put it over the dent, then set the iron on the hottest setting and simply iron over the dent. It may take a few tries to get it out; work over it a few times; you will see the steam rising; you may even want to re-dampen the rag again if it gets too dried out.

The water and steam simply raises the grain and will raise the dent right up. You can then scrape right over the surface to even it out.

Keep in mind the sooner you iron the dent, the better chance you will have to pull it up.  Also keep in mind that this only works on compressed dents. It is not too successful on a cut dent.

Go get an old iron for the shop; you will be glad you did!

Dresser Class 2012


We are well into our annual dresser course with 5 students, each making a beautiful 4-drawer dresser that they will take home at the end of this 2 week class. The week started by hand planing and scraping the insides of the chest sides, then each person hand cut 8 dado joints and then 12 mortise-and-tenons that hold the middle frames together. By the fourth day, all the carcasses were assembled. Then each student, with deep focus, turned to carefully cutting and paring the front dovetail pieces that will hold the front frame together.

Here is Larry assembling the back frame complete with raised panels and mortise-and-tenon joints.


You must understand some of these are business executives, some retired and some not. One student told us his friends think he is crazy for not using his 2 week vacation to go to France or something like that. But he has chosen to spend his 2 week vacation building an heirloom piece of furniture, one that will be around for hundreds of years. Long after that trip to France would have been forgotten, the memories of the man who built this dresser will live on, as will his own memories of having built this piece! So in my opinion this is the best vacation that one could take!

Even now, this evening, as I sit and write, I hear the soft tap of a mallet as it carefully strikes the chisel and the swoosh of the chisel as it pares through black cherry, then the blow of the craftsman as he blows the wispy shavings out of the way. These are the few students who have chosen to stay late into the evening, working with their hands creating timeless furniture of beauty and simplicity, with joinery that will stand the test of time.

Stay tuned, and I will try to keep you posted with the progress!

At the Kansas City Woodworking Show 2013!

This weekend, January 25th – 27th  2013,  we are in Kansas City, Missouri, to demonstrate at one of the Big Ten Woodworking Shows. Many of you have seen our set up at the Texas shows but we are pleased to be able to do the same in Kansas City. If you are anywhere near the area please stop in. We will be demonstrating hand tool joinery and the use of hand planes as well as inlay and even guitar making. You can check out a complete listing of what we will be demonstrating as well as the times right here. You will also be able to see many of the new class projects that we have developed in the past year. I have also brought along my Roses table that I just recently finished. You can read more about it here, and if you come to the show you can see it first hand!

As a bonus you will have the opportunity to buy some new tools from Lee-Valley and others. Check out the show and directions here on The Woodworking Shows website.

The show starts this Friday the 25th and runs through Sunday the 27th,  2013.

Hope to see you there!

New Blanket Chest Course

As I stated in my last post I have gotten a bit behind on writing in the blog. I was faced with the question on whether I should just write starting from now, or if I should go back and write about all the wonderful classes that we had, even though some of them were  over a month ago. Well I chose the latter.

The first week in August we had a blanket chest course which was a part of our new class series. In an effort to expand our project classes and teach new skills we developed this blanket chest course. It was by far our most popular new course, we had 6 students who signed up for it.

Cutting dovetails in the large chest sides was probably the most challenging part but everyone did well. There is a lot of work even after the dovetails are cut, including making the frame and panel lid, which is all mortise and tenon with a raised panel lid.

I have enclosed several pictures of work in progress below.

Carl sent in a picture of his finished chest after he oiled it. I think it turned out beautiful.

If you are interested in signing up for the next class in 2012 we have just published the schedule and have 2 offerings for the blanked chest. Click here to sign up..              BLANKET CHEST COURSE

Fine Tool Box

We just completed a fine tool box course. Each student built a very handsome box complete with 4 drawers that were veneered in black walnut which we resawed.  I chose a superior grade of alder for each box which was absolutely lovely to work with.  Traditionally tool boxes were built using pine because it is light weight. It is somewhat hard to find very clear pine down here, and the alder is quite light weight so I thought it would be good choice. If you have never worked with it, you really should try it out. It is amazingly easy to handplane and is very predictable. It also finishes to a beautiful brown color with a hint of red. I have heard it referred to as poor man’s cherry or western cherry, I found it much easier to work than cherry and the price is better too!

Here is Rogers cutting a tapered sliding dovetail for the drawers to ride on.Rogers chiseling the knife wall for a sliding dovetail

Here are a few more pictures, one of Steve chiseling out the waste on his dovetail and Tim sawing the box side down.

Steve is using a plow plane to plane the grooves for the back panel. This plane is an old Stanley #50 with a patent date of 1883, it works as good as new!

We glued the walnut veneer using hide glue, then cleaned it up with planes and scrapers.

Here is Rogers oiling his tool box with Deft Danish Oil. And then his finished box.

Here we are with the finished boxes. This class covers many aspects of hand tool woodworking, from making a frame and panel with mortise and tenons for the back, to dovetailing the whole box, as well as the drawers. We will have another class scheduled for next year and will post the dates within a couple months.

Completed Dresser Course

Our first 2 week Dresser course ended quite successfully on Saturday, May 28th (I am getting a little behind with my posts!). Bob left around 4 o’clock with a finished dresser, complete with oil. He was quite happy! I turned some maple knobs for him which contrast nicely with the cherry.

Here is Bob oiling the inside of the Dresser.

Don actually had to fly out to Seattle to be a referee in a soccer game. He left a day early but still finished! Here are the finished dressers on Friday afternoon right before Don left.

The last order of business was to put the trim in place and finish sand everything. On one of the dressers we actually cut a FULL blind mitered dovetail for the bottom plinth! You may wonder why you would spend so much time on a joint that would be totally hidden. Well this really was a traditional joint used on the bottom of a case, where you want the look of a clean mitered joint but still have the strength of a dovetail joint. There are many times when building a piece of furniture, that there are hidden joints that contribute to the strength and integrity of the piece.  I will write a step by step tutorial on how to cut this joint in a future post. Here are a couple pictures of the joint in progress.

Here is the finished full blind mitered dovetail joint. Nobody will ever know whats inside that joint except for you and me!

If you are interested in taking the next course stay tuned as we will be publishing our 2012 schedule in a few months. We will only hold this course once a year. Again, it is a great course and you will leave with a completed dresser! Just keep in mind it is a dovetail, hand tool workout. Also the Foundational Course is a required prerequisite to the dresser class. To register for the next class click on the link here or just drop us an email.